Create your Squarepaste account
Getting started with Squarepaste is quick and easy. Follow these steps to create your account and begin connecting with your clients.
Step 1: Sign up
Visit the Sign Up page, choose a plan, and enter your email address, name, and a password (at least 8 characters). You can also continue with Google. We'll email you a 6-digit verification code.
Step 2: Verify your email
Check your email inbox for the verification code and enter it on the verification page. Once verified, your account will be created automatically.
Step 3: Add your first client site
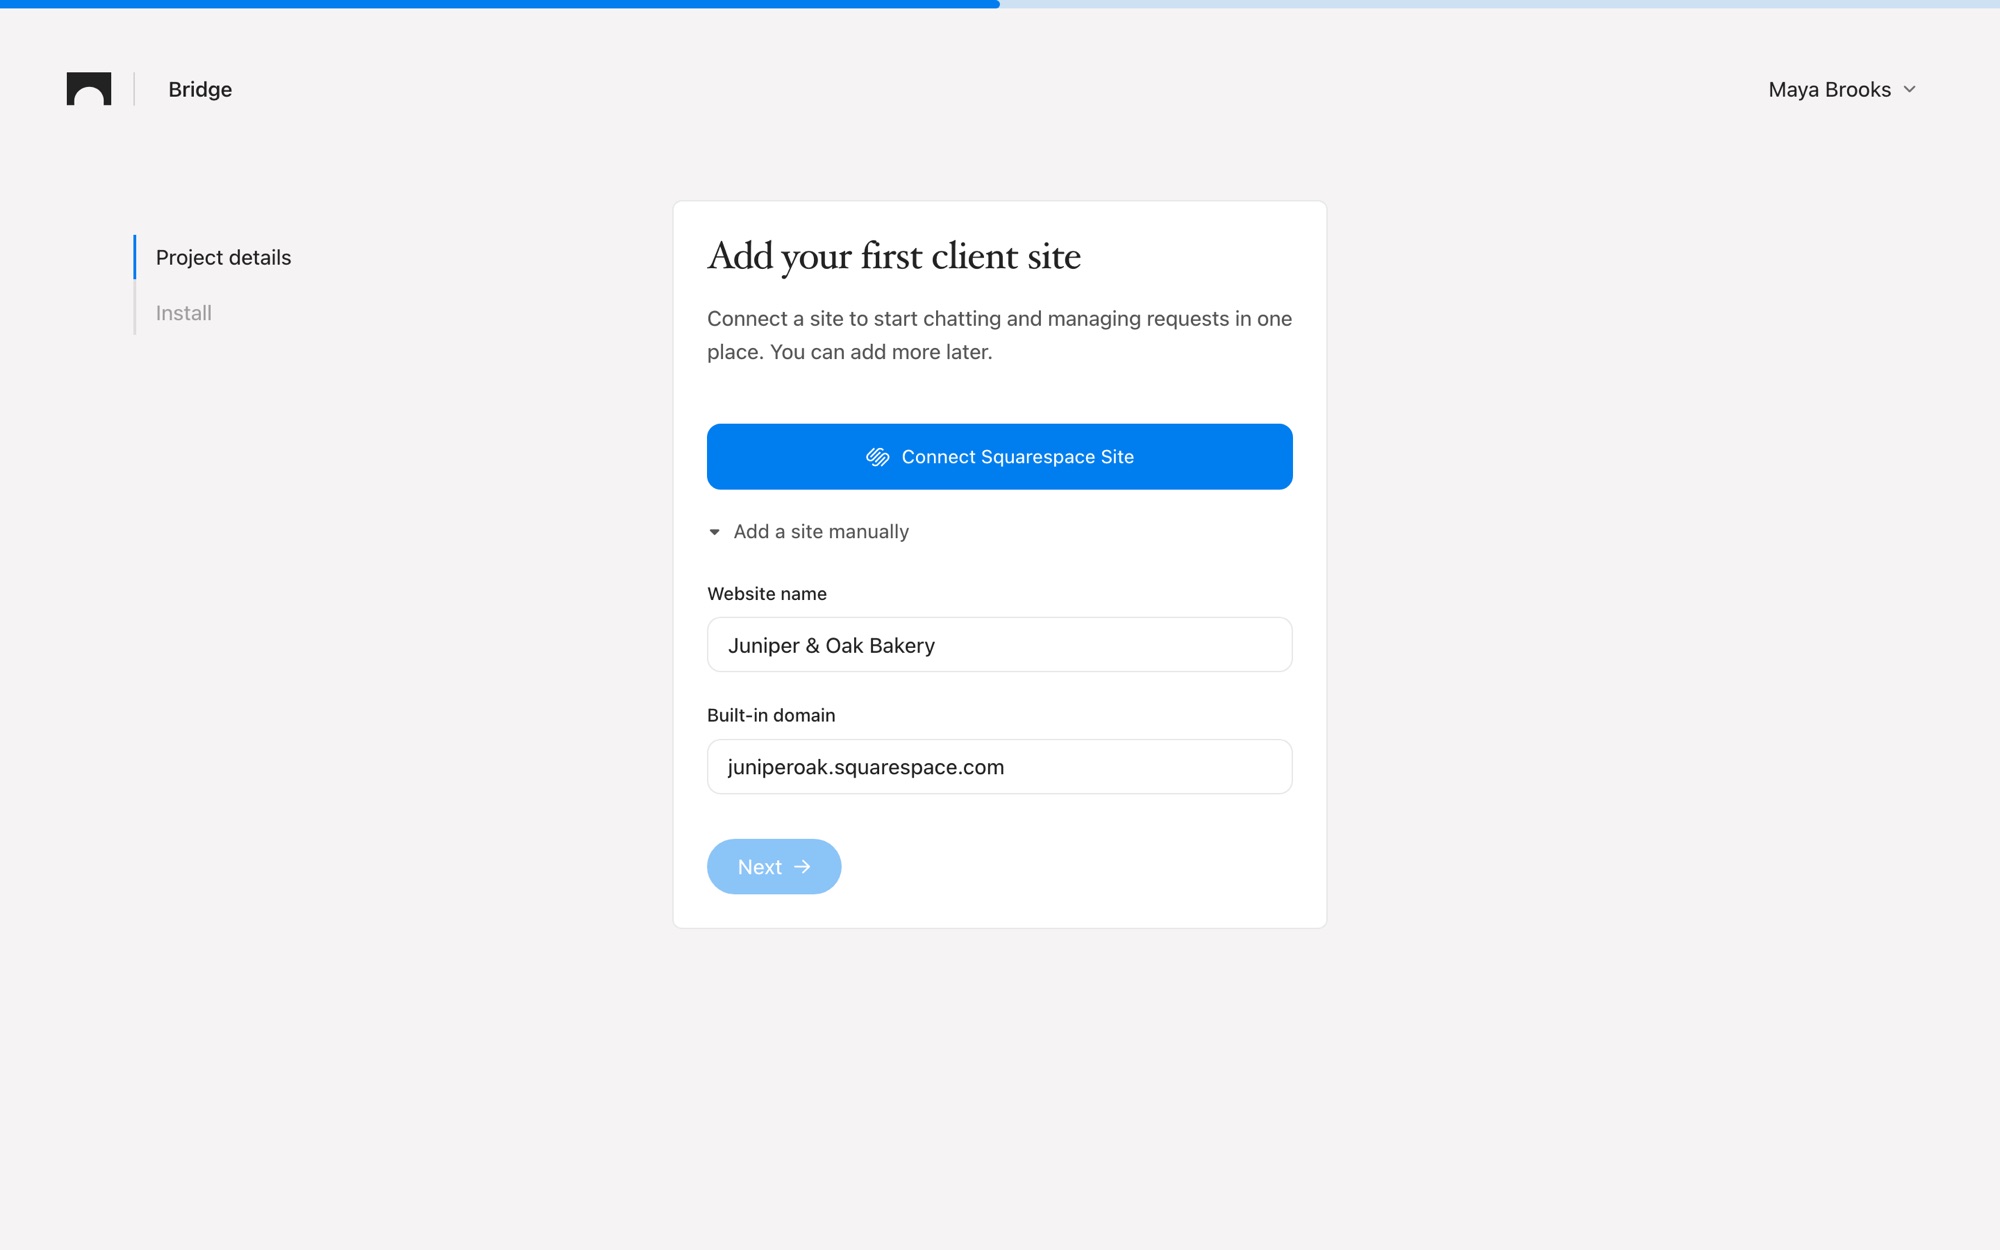
After verifying, you'll land on "Add your first client site." Click "Connect Squarespace Site," or choose "Add a site manually" and enter the website name and built-in domain (for example, yoursite.squarespace.com). Then copy your Squarepaste Code and paste it into the site's Header Code Injection.
Step 4: Access your dashboard
Once you've added your first site, you'll land on your dashboard. From there you can open projects, manage tasks, invite clients as members, and add more projects.
About plans and trials
Squarepaste offers three plans to fit your needs:
- Link Plan: Perfect for up to 5 Squarespace client sites
- Connect Plan: Manage up to 25 Squarespace client sites
- Atlas Plan: Unlimited Squarespace client sites
All plans start with a free 14-day trial, so you can explore Squarepaste risk-free. No credit card required to start.
What's next?
Now that you have an account, you're ready to:
- Add your first project
- Paste the Squarepaste Code into your site's Header Code Injection
- Invite your client as a member
Tip: Your free trial gives you full access to all Squarepaste features based on your selected plan. You can upgrade or change your plan at any time from Settings → Billing.